Setup & Installation Guide (Android & Web)
This guide will help you install and configure AeroKites Edu on your system for Android and web platforms.
Prerequisites
- Flutter SDK 3.22.3 (Stable Version) - Ensures reliability, long-term support, and seamless cross-platform performance.
- Dart 3.4.4 - Included with Flutter SDK; no separate installation required.
- Android Studio or VS Code - IDEs for writing and testing Flutter code.
- Java (TM) SE Development Kit 17.0.10 (64-bit) - Required for Android builds and Gradle.
- Firebase Console Account - Necessary for backend services and real-time data storage.
- Firebase Setup:
- Enable Firebase Authentication (Email/Password, Google Sign-In, etc.)
- Set up Firestore Database for real-time data management and deploy security rules.
- Configure Firebase Storage for uploading and storing media files.
- Enable Firebase Hosting (if deploying the web version).
📢 Note for iOS Setup:
The detailed setup and installation steps for iOS are covered separately from Step 14 onwards. Please refer to Step 14: iOS Setup & Installation for a complete guide.
Installation Steps
Step 1: Extract the ZIP File
After purchasing the AeroKites Edu package, extract the ZIP file into your working directory. The extracted folder will have the following structure:
- 📂 aerokitesedu
- ├── 📂 android
- ├── 📂 ios
- ├── 📂 web
- ├── 📂 assets
- │ ├── 📂 images
- ├── 📂 lib
- │ ├── 📜 main.dart
- │ ├── 📜 routes.dart
- │ ├── 📂 modules
- │ │ ├── 📂 admin
- │ │ ├── 📂 attendance
- │ │ ├── 📂 auth
- │ │ ├── 📂 banners
- │ │ ├── 📂 classes
- │ │ ├── 📂 dashboard
- │ │ ├── 📂 events
- │ │ ├── 📂 expenses
- │ │ ├── 📂 fees
- │ │ ├── 📂 gallery
- │ │ ├── 📂 homework
- │ │ ├── 📂 inquiries
- │ │ ├── 📂 parents
- │ │ ├── 📂 settings
- │ │ ├── 📂 staffs
- │ │ ├── 📂 students
- │ │ ├── 📂 subjects
- │ │ ├── 📂 timetable
- │ │ ├── 📂 worklist
- │ ├── 📂 core
- │ │ ├── 📂 extensions
- │ │ ├── 📂 layouts
- │ │ ├── 📂 services
- │ │ ├── 📂 theme
- │ │ ├── 📂 utils
- │ │ ├── 📂 widgets
- ├── 📜 firestore.rules
- ├── 📜 cors.json
- ├── 📜 firebase_storage.rules
- ├── 📜 pubspec.yaml
- ├── 📜 README.md
- └── 📜 analysis_options.yaml
Step 2: Install Flutter & Dart
Ensure you have Flutter and Dart installed. Run the following command to check:
If not installed, follow the official Flutter installation guide.
Step 3: Install Dependencies
Run the following command to install the required dependencies:
Step 4: Configure Firebase
To set up Firebase, follow these steps:
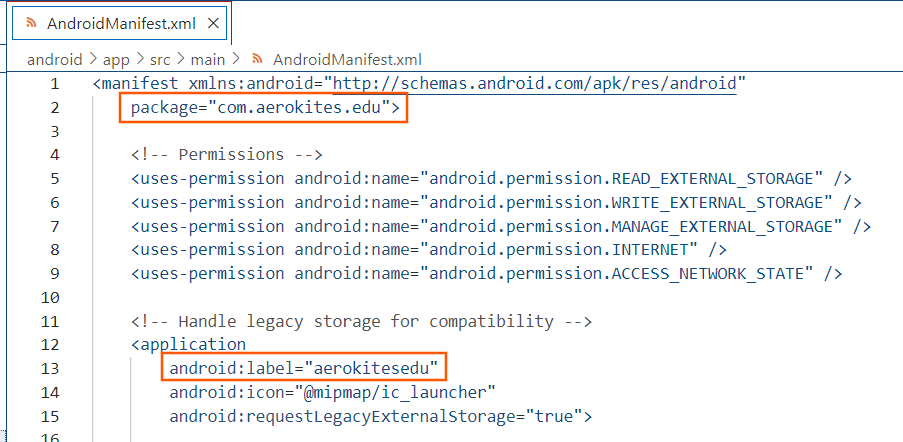
A. Update AndroidManifest.xml
Ensure the correct package name and permissions:
- Go to the Firebase Console.
- Select your project and navigate to Project Settings > General.
- Copy the Package Name (also called Android package name in Firebase) and ensure it matches your app’s
AndroidManifest.xml.
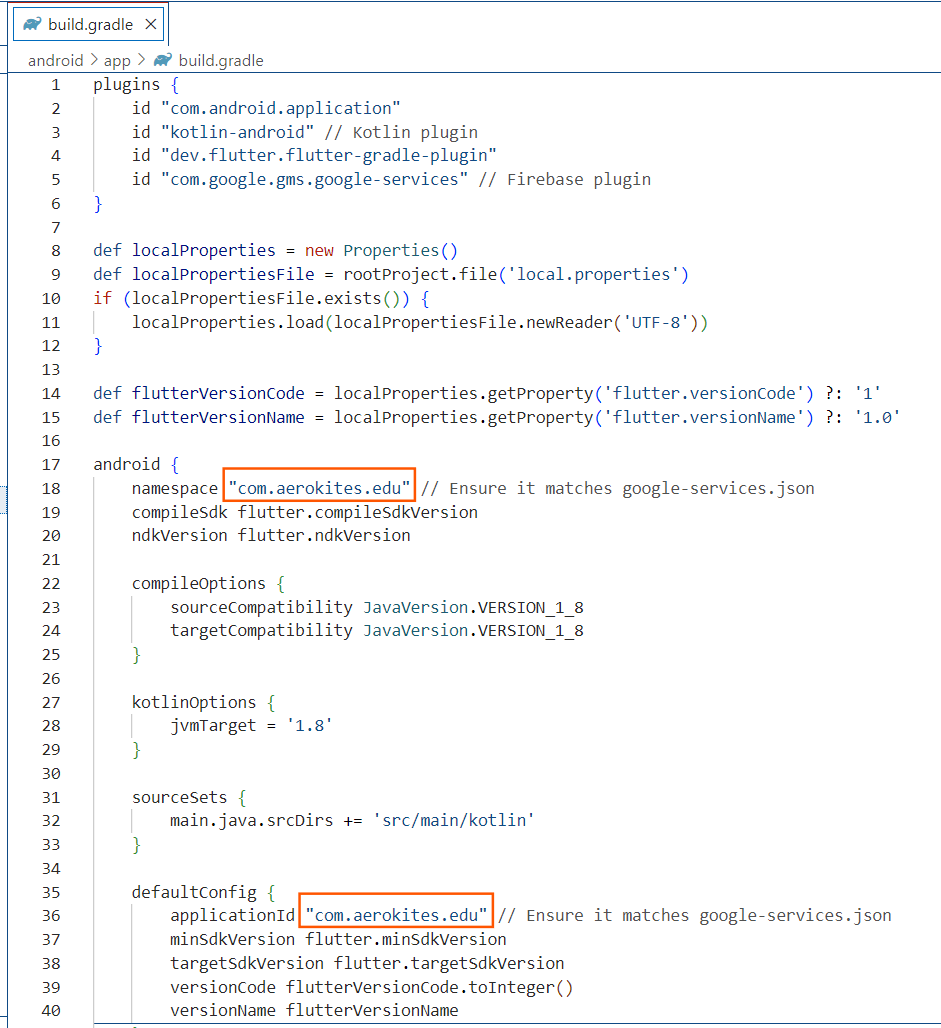
B. Update build.gradle
Verify that applicationId matches the Firebase configuration:
- Open
android/app/build.gradle. - Ensure the
applicationIdmatches the Package Name copied from the Firebase Console.
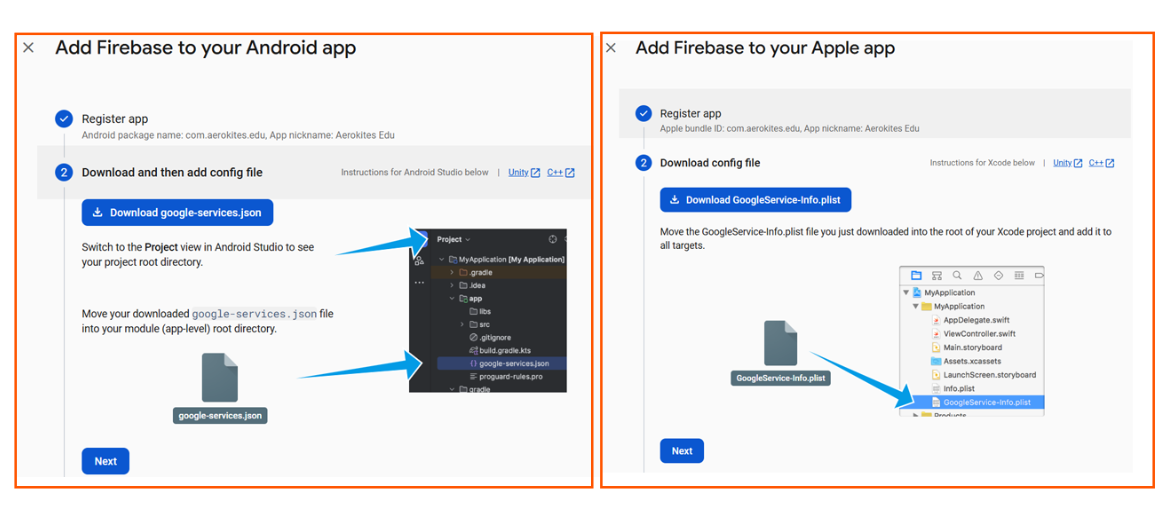
C. Download and Add Firebase Configuration Files
- Download
google-services.jsonfrom the Firebase Console and place it inandroid/app/. - Download
GoogleService-Info.plistfrom the Firebase Console and place it inios/Runner/.
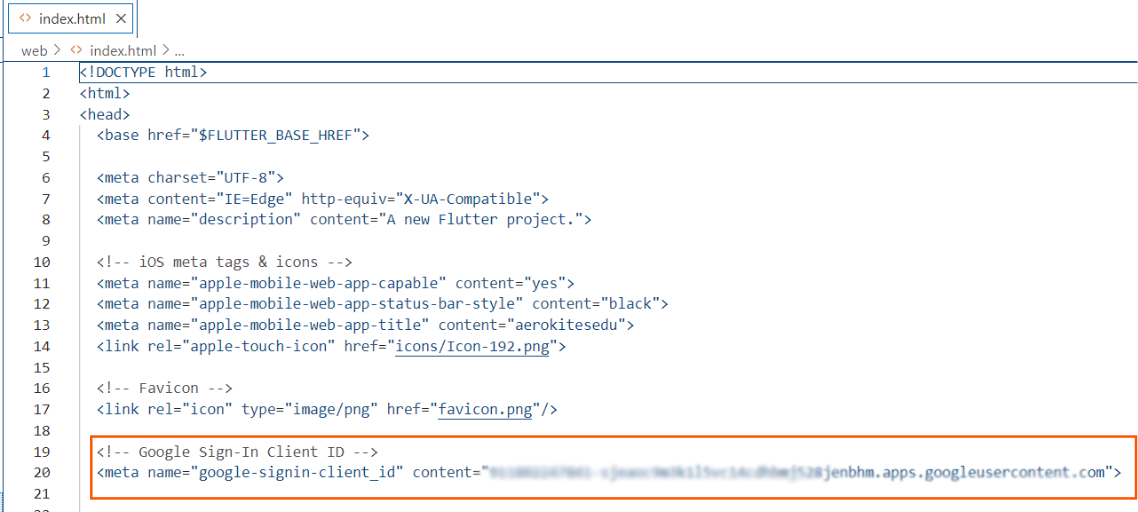
D. Update web/index.html
Add the correct Google Sign-In Client ID:
- Go to the Google Cloud Console.
- Navigate to APIs & Services > Credentials.
- Under OAuth 2.0 Client IDs, locate the entry labeled Web client.
- Copy the Client ID and paste it inside
web/index.html.
Note: The Web Client ID is auto-generated by Firebase when Firebase Authentication is enabled.
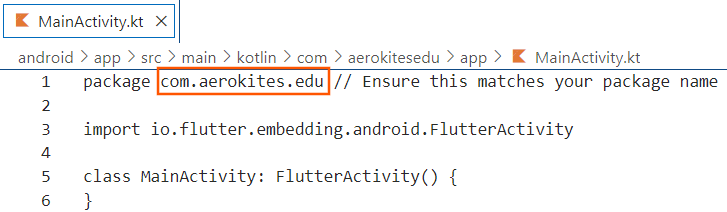
E. Update MainActivity.kt
If you change the package name, update it inside MainActivity.kt as well.
Step 5: Deploy Firestore & Firebase Storage Rules
The project includes predefined security rules to protect Firestore and Firebase Storage. To apply them, follow these steps:
Deploy Firestore Rules
Deploy Firebase Storage Rules
These rules ensure that only authenticated users can read/write necessary data while preventing unauthorized access.
Step 6: Update Firebase Config
The app uses a file named firebase_options.dart to store Firebase configuration for all platforms (Android, iOS, Web).
In this project, we’ve placed the file at:
To generate your own configuration file after purchase:
This command will generate firebase_options.dart by default in the lib/ folder. Please move it to:
so that the app can locate and use it correctly.
Important Notes:
- The file included in the source is pre-filled with demo values to ensure the app builds successfully for review.
- You must regenerate this file using your own Firebase project credentials and move it to the correct path as shown above.
- You can configure support for Android, iOS, Web, etc., during the CLI prompt.
Add Admin User & Configure Email Settings
Before using the app, you need to manually add an Admin User to Firebase Authentication and Firestore. Additionally, configure the email settings for notifications and registration using the Brevo API.
A. Add Admin Email in Firebase Authentication
Navigate to Firebase Console > Authentication > Users and click Add User.
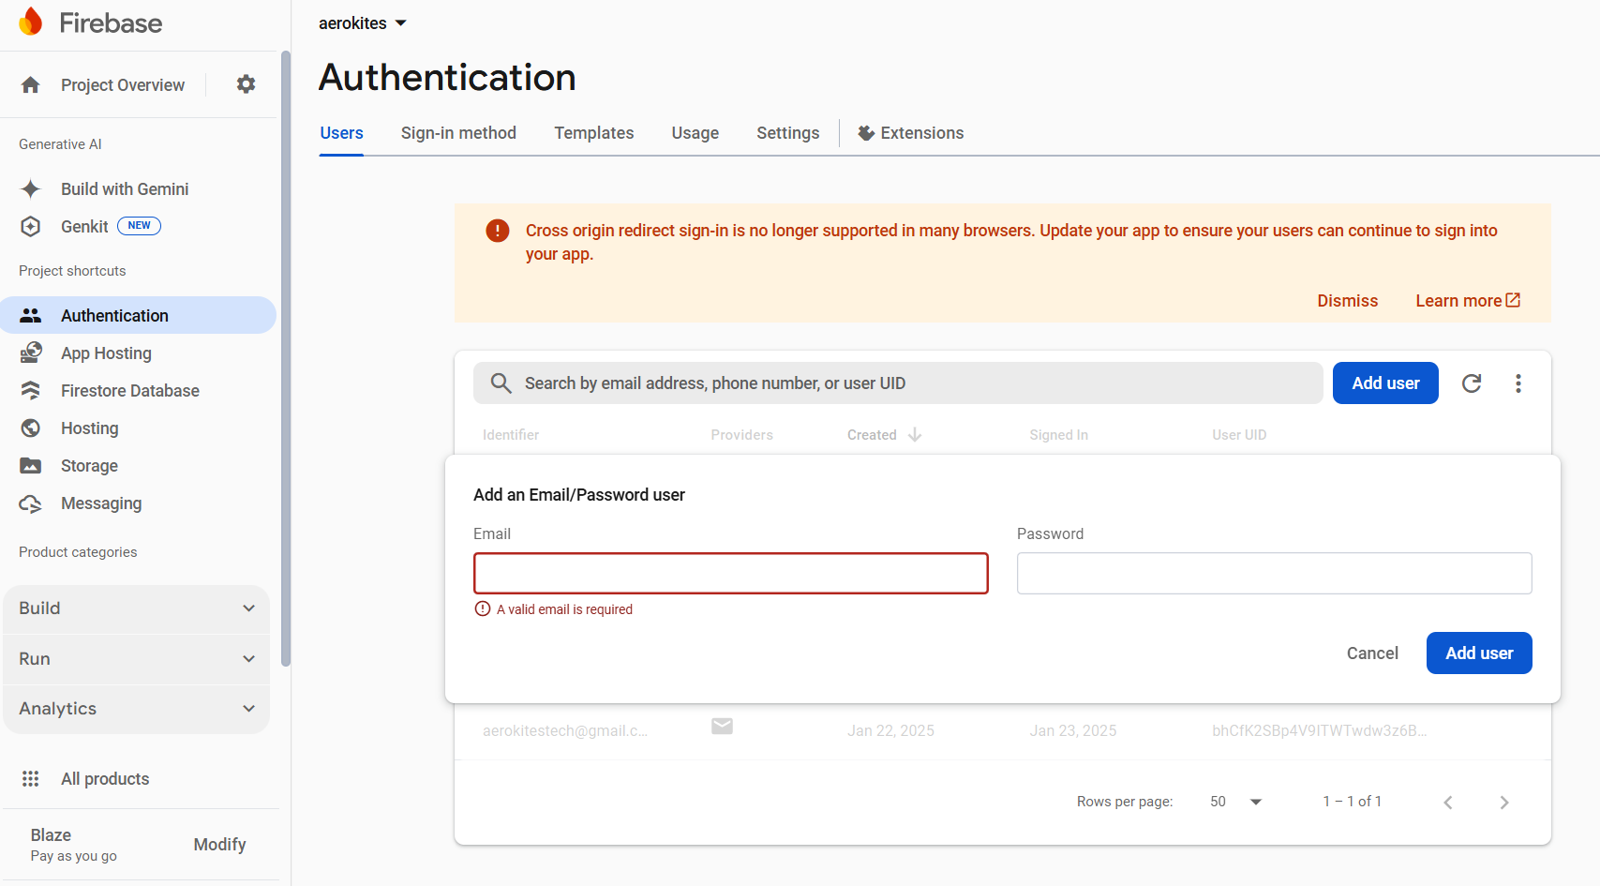
Enter the Admin Email and a temporary password, then click Add User.

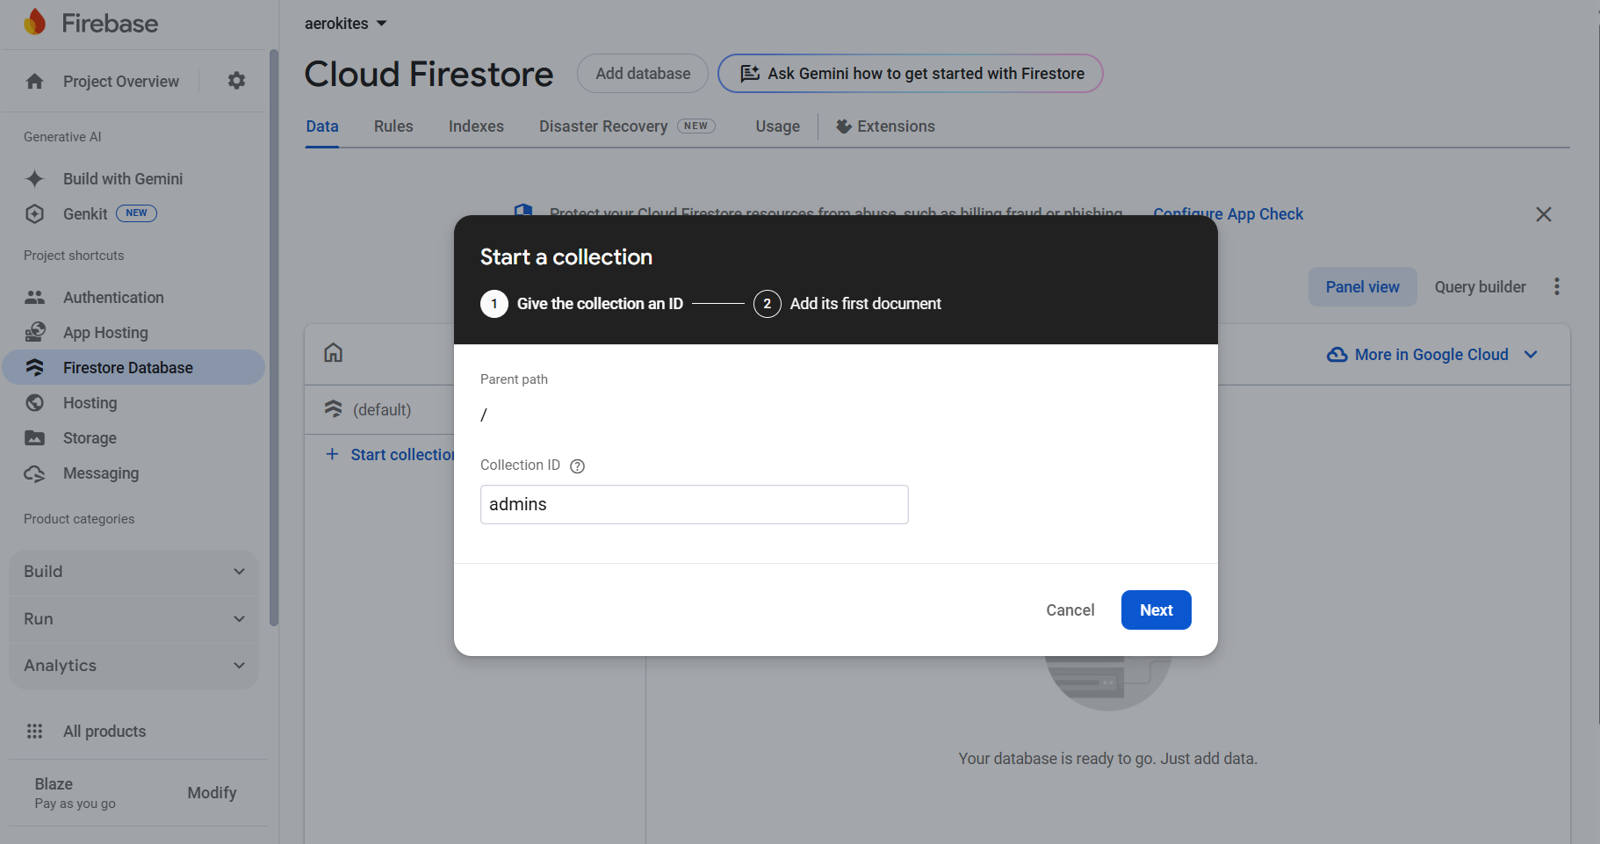
B. Assign Admin Role in Firestore
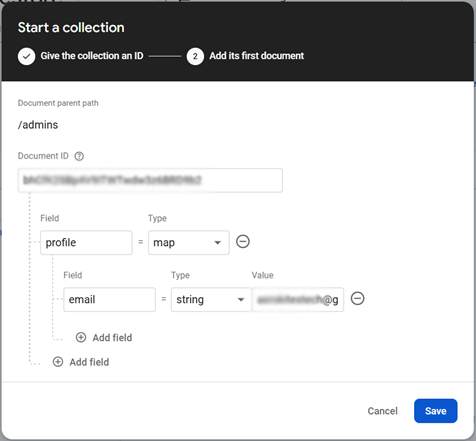
Next, go to Firestore Database > Start Collection and create a collection named admins.
Create a document using the User UID from Firebase Authentication.
C. Configure Email Settings
Email notifications in the app are used for user registration, inquiry confirmations, and other communications. The system uses the Brevo API for sending emails.
Accessing Email Settings
Navigate to Settings > Email Settings in the application.
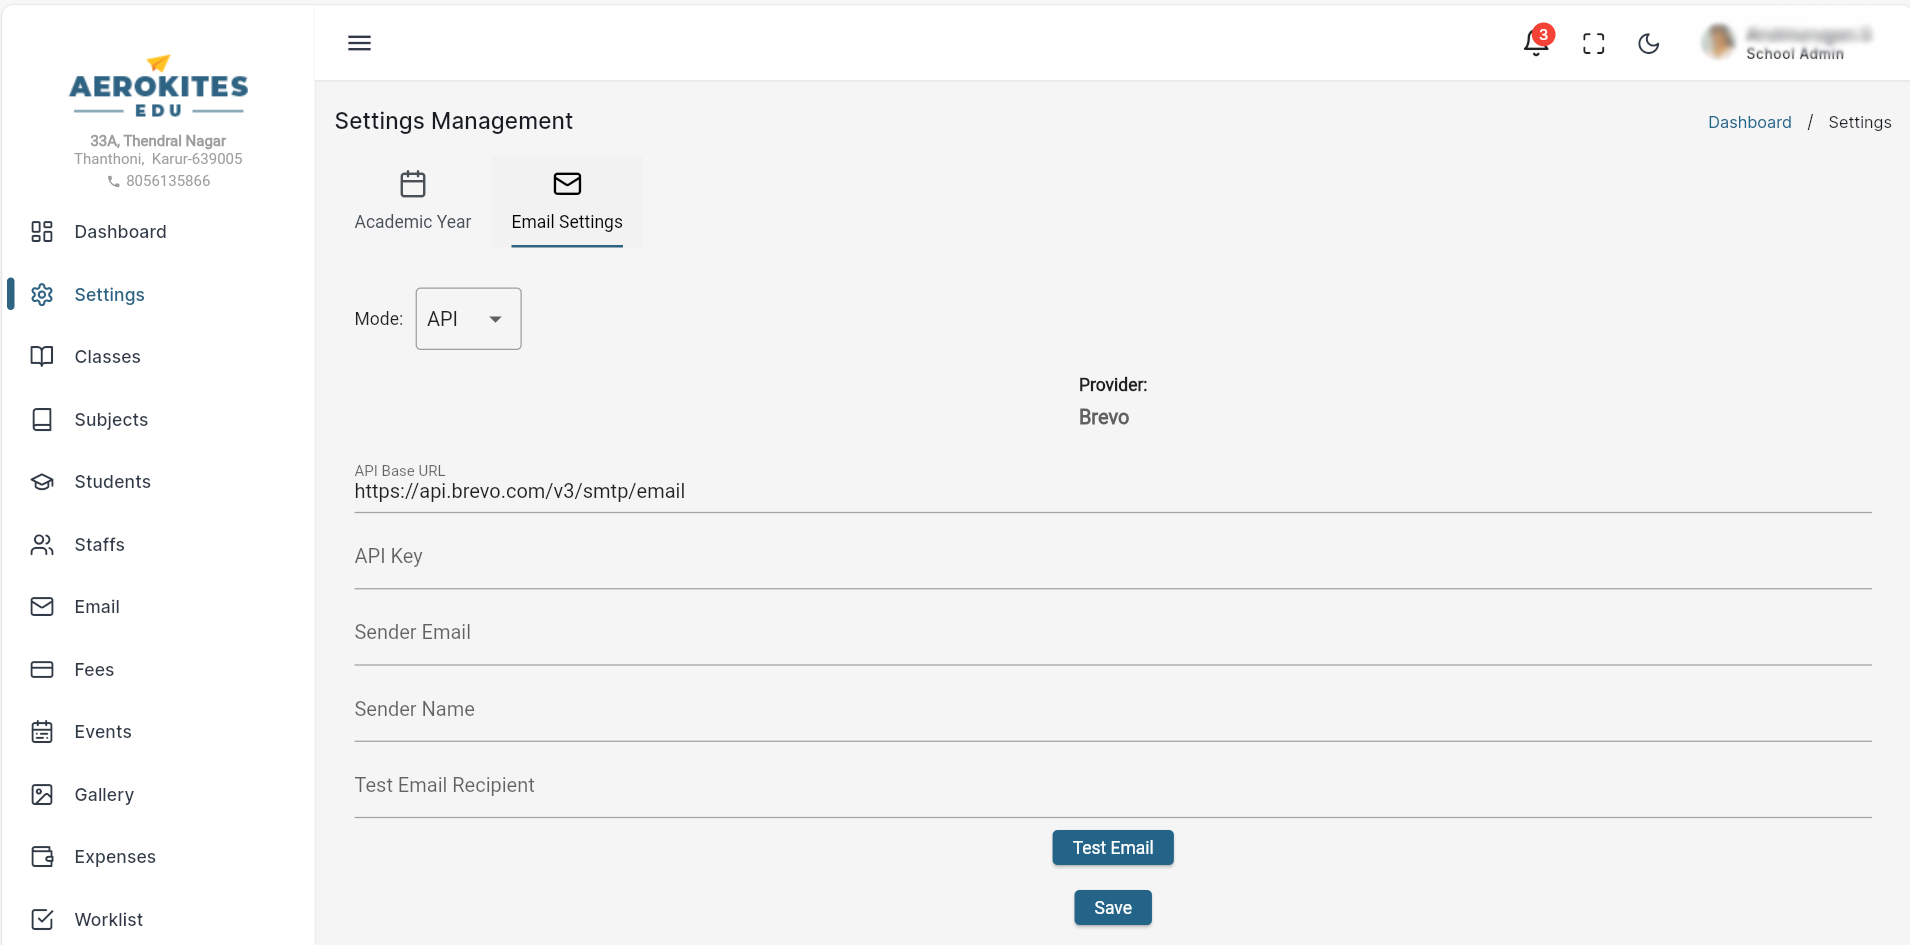
Configuring API Mode
Ensure the mode is set to API, enter the API Base URL (https://api.brevo.com/v3/smtp/email), and paste your API Key. Fill in the Sender Email and Sender Name, then save the settings.
Generating Brevo API Key
Go to the Brevo API Key Console, click Generate a new API Key, and copy it into the app’s email settings.

Saving & Testing
After entering the details, click Save and test the configuration by sending a test email to a recipient.
More Information
For detailed Brevo email setup:
D. User Signup/Login Workflow
The user registration and authentication process follows this structured workflow:
Adding Parent or Inquiry Details by Admin
- The system uses Firebase Authentication exclusively for admin users and deferred authentication for parents and inquirers.
- When adding a student, the system stores the parent’s details along with their email in the Firestore
parentscollection, but does not create a Firebase Authentication UID yet. - When submitting an admission inquiry, the system stores the inquirer’s details in the Firestore
admission_inquiriescollection with an auto-generated ID, without creating a Firebase Authentication UID. - After storing their details, the system sends a welcome email to parents (for student additions) or a thank-you email to inquirers (for inquiries) via Brevo, containing no login details until further action is required.
- Note: Proper email configuration is required to send these notifications.
Parent/Staff Completes Registration
- For parents (after student addition), the email received contains a link to complete registration using “Continue with Google”.
- For inquirers, no registration link is provided until their inquiry is converted to an admission.
UID Creation Using Continue with Google
- Upon clicking “Continue with Google” (for parents after student addition or inquirers after admission), their account is created in Firebase Authentication.
- Their Firebase UID is then linked to their existing profile data stored in Firestore.
Logging In & Setting Password
- After completing registration via Google Sign-In, the parent or inquirer (post-admission) can log in using Google authentication.
- To set a password, they can use the reset password link available on the login page.