iOS Xcode Configuration & Signing (Step 14)
To properly configure the iOS project for AeroKites Edu, open Runner.xcworkspace in Xcode and follow these settings:
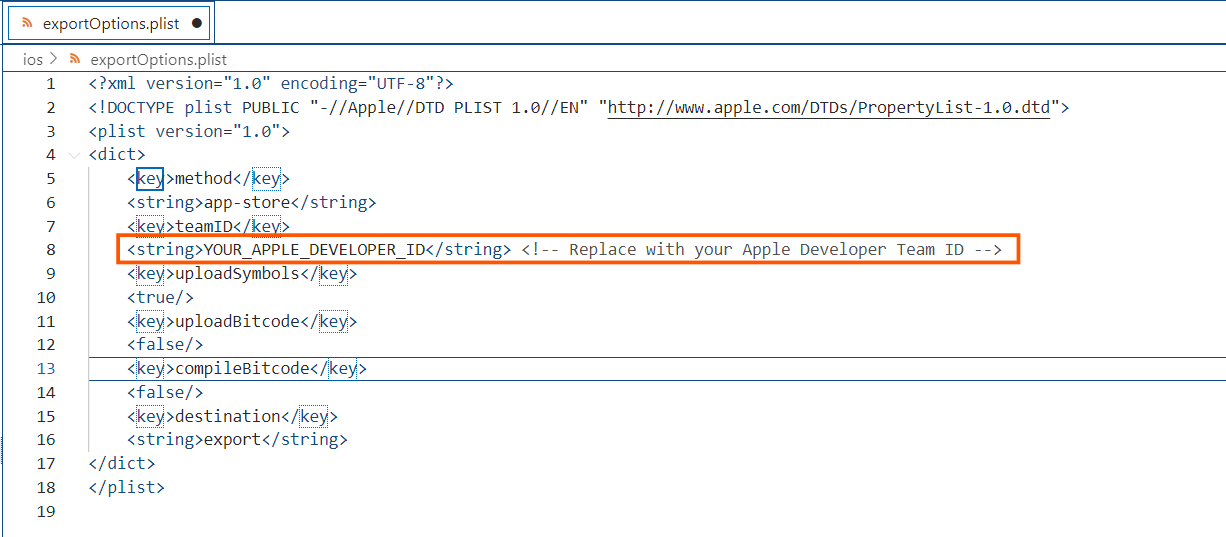
Configure Export Options for iOS Build
Before building the iOS app, you need to set your Apple Developer Team ID in the exportOptions.plist file. This file is used during the export process to sign the app.
- Open the
ios/exportOptions.plistfile in a text editor. - Locate the
<key>teamID</key>section. - Replace
YOUR_APPLE_DEVELOPER_IDwith your actual Apple Developer Team ID, which you can find in your Apple Developer account under Membership details.
General Tab (Xcode)
- Bundle Identifier: com.yourcompany.app
- Team: Set to Apple Developer Team ID
- Deployment Target: iOS 13.0+ (or latest supported)
Signing & Capabilities
- Automatically Manage Signing: Enabled
- Signing Certificate: iOS Development / Distribution
- Provisioning Profile: iOS App Development (or Distribution for App Store)
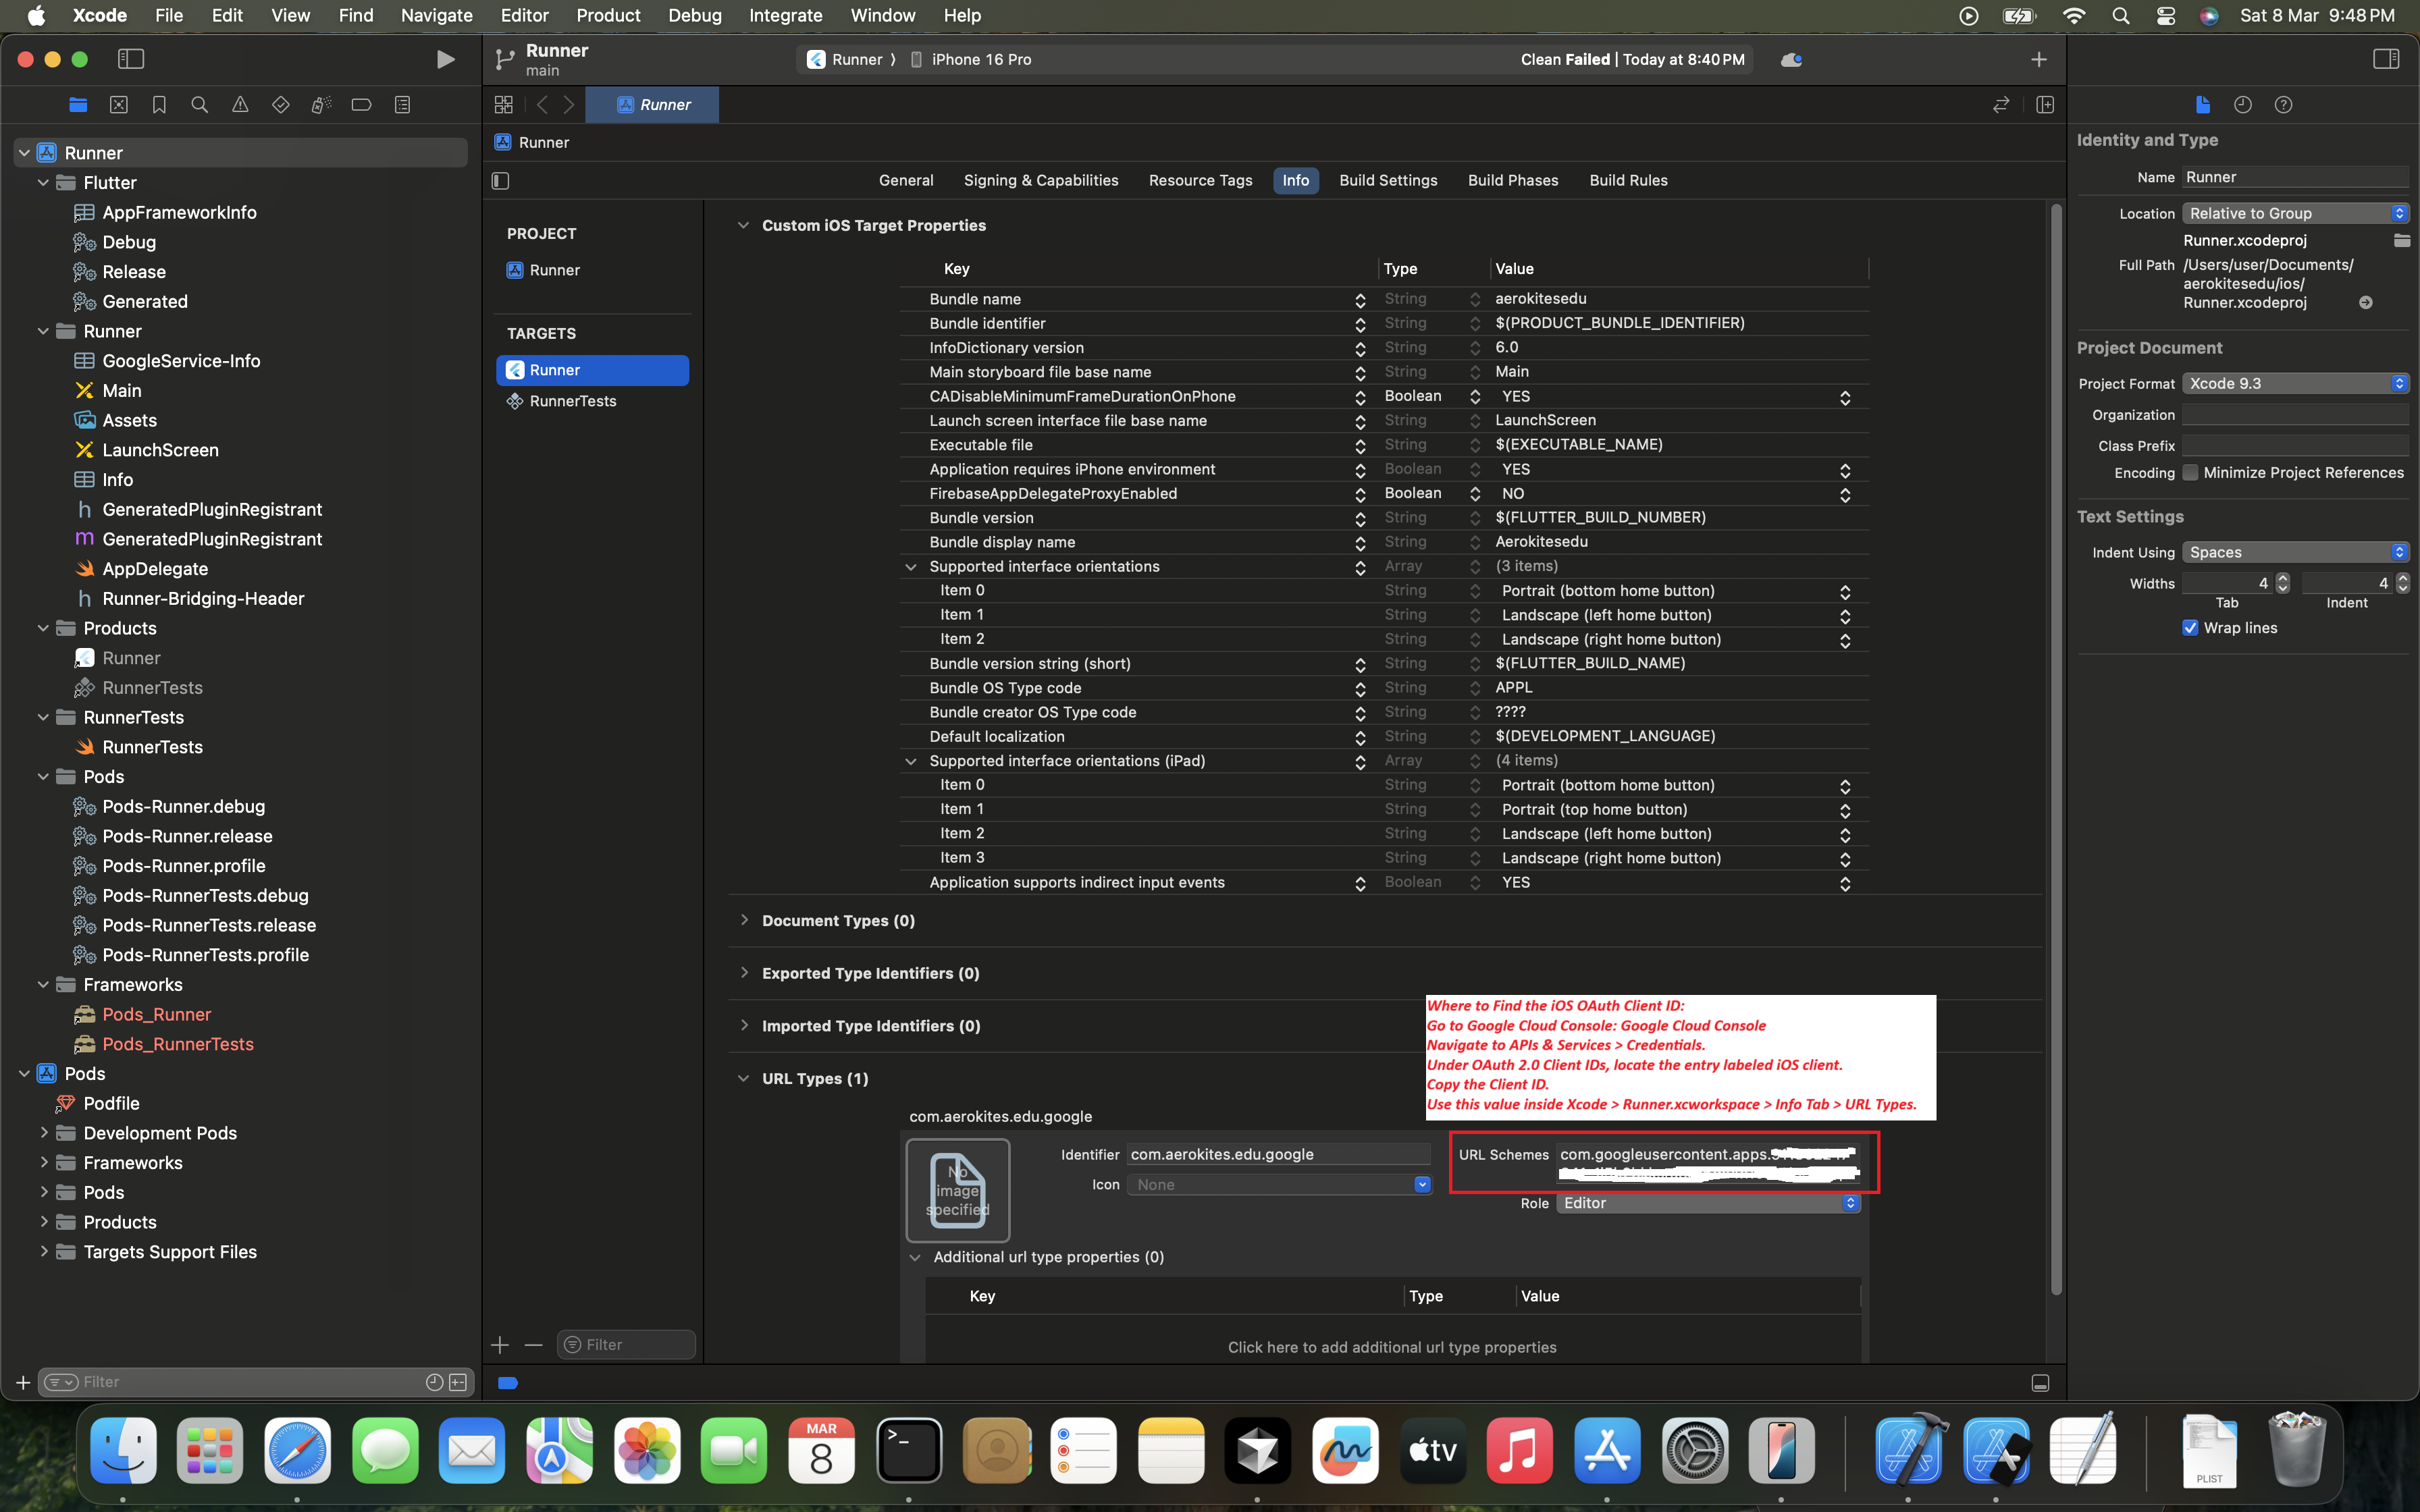
Configuring iOS OAuth Client ID in Xcode
To ensure Firebase authentication and other Google services work properly, the OAuth Client ID for iOS needs to be configured in Xcode.
Where to Find the iOS OAuth Client ID?
Follow these steps to get the correct OAuth Client ID:
- Go to the Google Cloud Console.
- Navigate to APIs & Services > Credentials.
- Under OAuth 2.0 Client IDs, locate the entry labeled iOS client.
- Copy the Client ID.
Where to Use the OAuth Client ID?
Once you have the iOS OAuth Client ID, add it in Xcode:
- Open Xcode and load the
Runner.xcworkspacefile. - Go to Info Tab > URL Types.
- Click the + (plus) button to add a new entry.
- Set the Identifier (e.g.,
com.yourcompany.app.google). - Paste the copied OAuth Client ID into the URL Schemes field.
Refer to the screenshot below for the correct setup:
View Complete Xcode Configuration Screenshots
Click the image below to view all Xcode settings in a gallery:

×
❮
Next Steps
Proceed to Step 15 to configure deployment and testing.